Follow Me on Pinterest

Saturday, July 27, 2013

Anticipating the Year of the Cicada in North Texas (either 2014 or 2015)

There is a huge increase in the number of cicada killers and cow killers (velvet ants) on my place here in North Texas during the summer of 2013.  Compared with previous years, the population increase is 4-5 times what I typically see.  Both of these bugs are solitary wasps.  After doing some research, I believe that these two wasps may be gearing up their numbers this year in anticipation of the upcoming "Year of the Cicada" - either in 2014 or 2015 in Texas.  See the following link for more info.
 http://www.cicadamania.com/

There are good maps of the cicada emergence at this link:
http://magicicada.org/magicicada_ii.php


I haven't found many cicadas or cicada "shells" in my yard this year, but I did find one - you can see it in real light below.


Here is a good picture at dusk that shows the beautiful veining of the wings.


 I hear them periodically (every year) - they are LOUD when you get up next a tree where they are buzzing.  Next year and 2015, I expect their populations to be much larger and they will be even louder than now. 

Cicada Killers:  I see them in large numbers flying back and forth and harassing each other. They try to establish a territory and chase all other males away as they wait for females to come along. The males are aggressive toward each other, but they don’t bother humans because the males can’t sting.

The females are bigger, nearly 2 inches long and fatter. Once mated, the females spend their time digging a 6-10 inch long burrow (my vegetable garden soil is sandy - that is why I'm seeing them there). Then, over the next 4 weeks the females hunt for cicadas. The female cicada killers can sting, but they are very non-aggressive toward humans and almost never sting unless grabbed or stepped on in bare feet.

Female cicada killers will capture up to 100 cicadas. She stings and paralyzes each one, and then airlifts it back to her burrow.  Once in the burrow, she deposits one egg on the paralyzed, cicada so that her larvae will have a fresh and ready meal when it hatches in a few days. The cicada will be eaten alive.

Below are pictures of cicada killers in my vegetable garden.  See link below for a discussion of their increasing numbers this year:
http://www.theatlantic.com/national/archive/2013/07/the-cicada-killers-are-coming/277688/

A cicada killer flying to his hole built in my raised bed vegetable garden.


 In flight!


One of many holes in my raised vegetable garden beds.


Cow Killer (aka as Velvet Ant):  This wasp doesn’t kill cows but rather it got its name because its sting was said to hurt so bad that it could kill a cow.  It is a wingless, hairy, orange-red, solitary wasp that actually acts and looks like a large ant. It is looking for cicada killer burrows. The cow killer goes down the burrow of the cicada killer and lays her own egg on the paralyzed cicada. But when her egg hatches it eats the larvae of the cicada killer, not the cicada.

The adult velvet ants feed on nectar and water.  When it is ready to become an adult, the velvet ant pupates inside the nest of the wasp where it will emerge the next season.

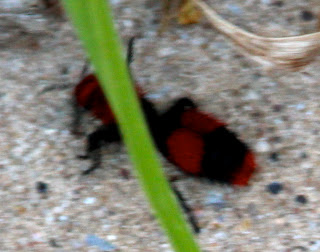
Below are pictures of the velvet ant (aka cow killer) taken in my flower garden.  The female has no wings. Here is an article on these insects:

https://insects.tamu.edu/fieldguide/cimg344.html

Female - no wings


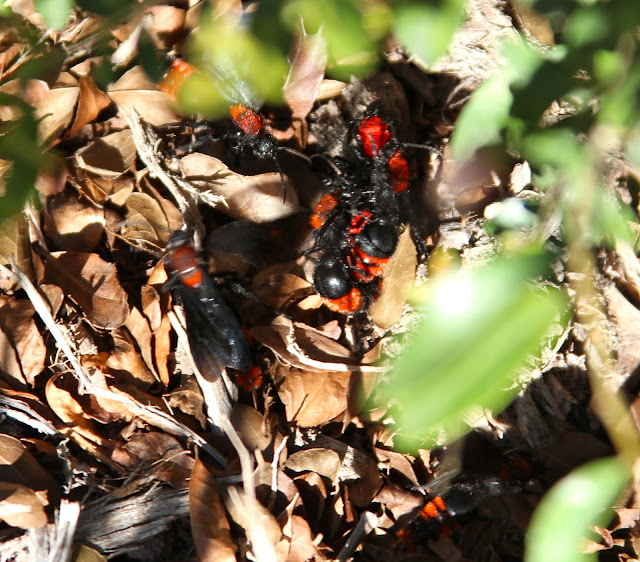
Check out all the males with wings!  These pictures were taken in my flower garden.


Wednesday, July 24, 2013

Building Our Wooden Rainwater Cistern

 Here in north Texas we experience frequent dry conditions in the summer.  We built a rainwater collection cistern out of western red cedar and use the collected water for irrigating our trees and landscaping.  The cistern holds 3000 gallons of water and is approximately 8 feet tall (not including roof height) and 8 feet in diameter.  It drains approximately half of our roof, which is approximately 1600 square feet.  Although not exact, our observations are that for every 1" of rain, the tank fills up about 2 feet - so 4" of rain would fill it up.    

My husband wrote a book about how to build cisterns similar to this one.  

You can purchase it at:  http://woodcistern.com/

Below are some pictures of it under construction.
 

It rests on a concrete foundation that is approximately 8 1/2 feet square.  It has 28" outer beams and one inner beam.

Below is a description of some of the key points of building the cistern.

 Using a jointer to machine one straight edge on the staves.
 Using the table saw to machine a parallel straight edge to the one machined on the jointer.

 Using a router and a jig to cut a dado (groove) on each stave to fit around the cistern floor.
Lining up a jig on the stave to mark the holes for the dowels that are drilled (next 3 pictures).


Using a drill press to cut holes on the floor boards for the dowels that hold them together.
 

Putting the floor together using dowels.
The floor is placed on the 4" X 6" and 6" X 6" grid that supports it and keeps it off the concrete foundation. 

Putting the staves together. 


Building the roof on temporary short staves while supporting the center post. 
Detail showing the temporary short staves that support the roof joists.

 This is the center post which also provides ventilation to the roof. 

Supports that hold the plywood roof sections in place until they are screwed to the joists.

 Detailed view of the side of the roof panels showing the beveling.

The finished (and freshly stained) new cistern!

Not shown in the pictures is the installation of a made-to-fit food grade plastic liner.

The hoops holding the staves together were made from mobile home tie downs.  We chose them for their high strength and because they were galvanized and relatively inexpensive.

Also not shown is the plumbing from the roof to the cistern.  We used 3" and 4" PVC.  It is plumbed from the roof gutter.  We drain the cistern in the winter to prevent freeze damage. 

See the video below for 3-D model of the cistern being constructed.


Saturday, July 13, 2013

How to Make Beef Jerky

My family loves beef jerky and the kind you buy in the store just does not compare to the kind we make at home.  It is not hard, just time consuming.  It is definitely worth it.

To get started, we purchased about 5-6 lbs of boneless roast.


Next, slice off all the fat.


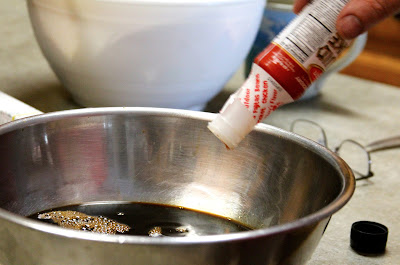
Get the marinade ready.  You will need 1 bottle Worcestershire Sauce, 1 bottle low salt Soy Sauce, and 1/4 bottle of Liquid Smoke.


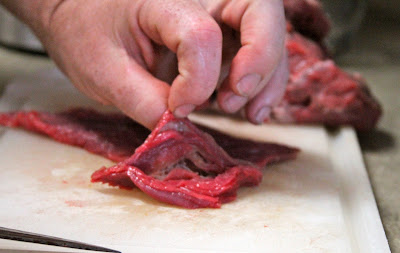
Next, slice the roast in thin pieces - like thick bacon.


Put the pieces in the marinade to soak overnight.

Cover and place bowl in the refrigerator for 8-12 hours so it can soak up the marinade.

The next day, get the food dehydrator prepared to do some work.  We use the Magic Chef - this dehydrator is about 10 years old and does an excellent job.

Start with paper towels.

Strain the marinade from each piece.

Lay the meat slices on paper towels to drain further.

Continue to stack meat slices to drain.

Place meat slices on each level of the food dryer.


Plug in and dry for at least 24 hours.  On our dryer, the levels dry at different rates, so we have to swap the levels around to get even drying.  Dry until all moisture appears to be gone, but not so that the pieces are brittle. The finished jerky looks like this.


Bag up jerky in sealed plastic bags.  Ready to eat - Delicious!